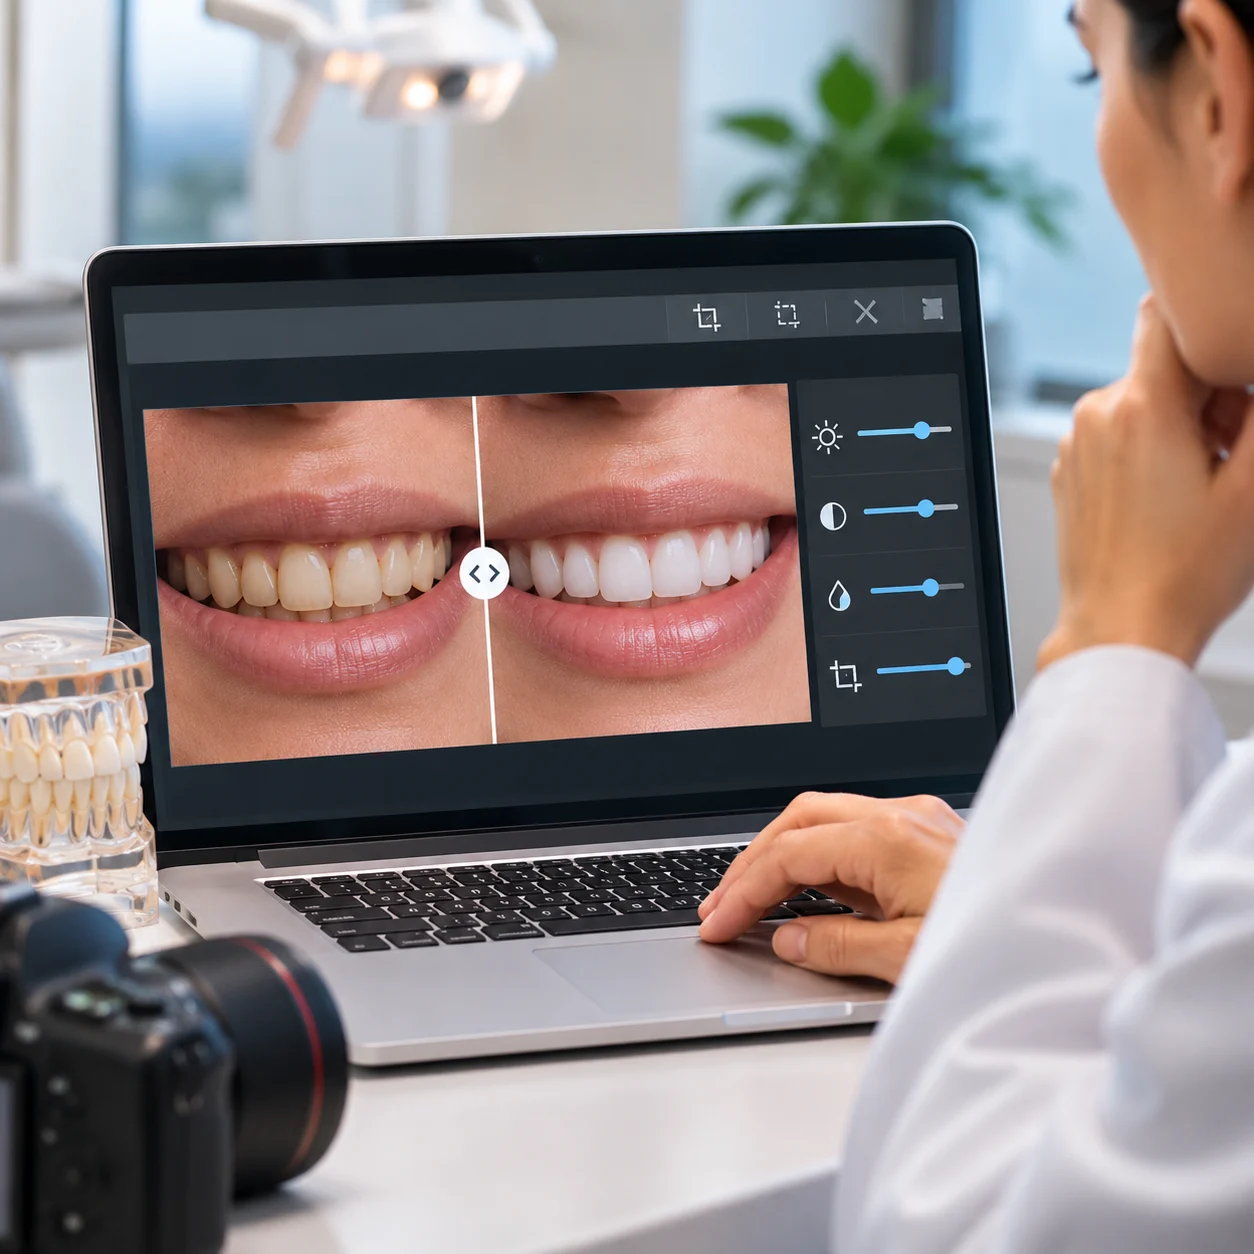
Before-and-after dental photos can speak volumes about your work. A carefully documented smile transformation gives prospective patients a closer look at what a treatment can achieve and helps them feel more confident about choosing your practice. But when it comes to editing those photos, where do you draw the line? Brightening an image or correcting its orientation may seem harmless, but changing tooth shade, gum appearance, or the final result can give patients an entirely different impression of your work. And in healthcare marketing, that distinction matters more than you might think. Before you share your next impressive smile makeover, it pays to understand which edits are acceptable and which could raise legal or ethical concerns.
Read on to understand which edits are acceptable, which could cross legal and ethical boundaries, and how to showcase your dental work while keeping patient trust intact.
Choosing a dentist is a personal decision, and patients often want to see what a treatment could realistically achieve before committing to it. Before-and-after photos give them a closer look at actual dental work, whether it's a smile makeover, teeth whitening, or restorative treatment.
Well-presented dental photos can help you:
However, there's an important distinction between showcasing your work and making a result look better than it really is. Changing tooth shade, reshaping teeth digitally, or removing visible imperfections can give patients a misleading impression of the treatment outcome. You also need the patient's appropriate consent before using identifiable clinical photographs in marketing, and you must protect their confidential information.
Before-and-after photos can be valuable for dental marketing, provided they remain an honest representation of the treatment. Keep the original images, use only edits that don't distort the clinical result, and check the dental advertising and privacy requirements that apply to your practice.
A little photo editing can make your before-and-after dental photos look cleaner and easier to view. The trick is knowing where to draw the line. Cropping out empty space or resizing an image for your website is one thing; editing a patient's teeth to make the results look better is another.
Here are six types of edits dentists can generally consider, provided they don't misrepresent the treatment or breach applicable advertising and professional rules.
A little cropping can go a long way when you want patients to focus on the smile rather than the empty space around it. You can crop an image to fit your website, create an Instagram carousel, or bring the teeth into clearer view.
Just make sure the crop doesn't leave out details that help people understand the result. Removing a shade guide, surrounding teeth, or other relevant context could make the treatment appear more dramatic than it was.
Safer edit: Cropping a full-face photo to create a closer view of the smile.
Riskier edit: Cropping out a shade guide because it makes the whitening result look less impressive.
Sometimes the camera isn't perfectly level, and the resulting photo looks a little crooked. Straightening the image can make it easier to view without changing the actual dental result.
Keep the correction consistent across both photos, though. If you straighten the after photo but leave the before photo tilted, the comparison may look less reliable. Ideally, take both images from the same angle in the first place.
Large image files can slow down your dental website, so resizing and compressing photos is a practical way to improve page loading. You can adjust the file dimensions and size to suit your website or social media platform without changing the appearance of the teeth.
Keep the original, high-resolution images safely stored, too. That way, you have an untouched copy if you need to review the case or verify how the photos looked before editing.
Ever taken a dental photo that looks unusually yellow or blue because of the lighting? A careful white-balance adjustment can help correct that color cast and make the image look closer to what the camera was meant to capture.
The important part is consistency. Apply comparable corrections to both images, and don't use color adjustments to make the after photo look whiter or conceal staining, gum inflammation, or discoloration. Your best bet is to use consistent lighting and camera settings when taking the photos, so you have less editing to do later.
In the U.S., dentists should ensure edited photos don't create a misleading impression under applicable advertising rules, including FTC guidance on truthful advertising. In the UK, the GDC's standards and the ASA's advertising rules also matter when dentists use before-and-after images to promote treatments. Neither country's rules make every color correction automatically acceptable or unacceptable, so the safest approach is to keep edits subtle and preserve the actual appearance of the teeth and gums.
A stray hair, a piece of lint, or an object in the background can draw attention away from the smile. Removing an unrelated distraction may seem harmless, but pause before using the editing tool. If the change affects how the teeth, gums, lips, or treatment results appear, it can give patients the wrong impression.
For example, removing a reflection from a mirror is different from removing redness around the gums or a stain on a tooth. The first may be a simple cosmetic correction; the others change details that patients could use to judge the treatment outcome. When in doubt, leave the image untouched.
A photo can show the result, but a short label can help patients understand what they're looking at. You can add treatment names, timelines, or arrows to highlight a specific area, as long as the information is accurate and doesn't exaggerate the outcome.
For example, labels such as “Porcelain veneers,” “Composite bonding,” or “14 months of Invisalign treatment” can give useful context. Just make sure the description reflects the actual case. Calling a result “instant veneers” when treatment involves several visits, temporary restorations, and laboratory work would give patients a misleading picture of what to expect.
The same rule applies to arrows and annotations: use them to explain the treatment, not to make the result appear more impressive than it really is.
Small edits can help prepare dental photos for your website, but changing the treatment result is a different matter. The line is simple: your photos should show patients what the treatment actually achieved, without creating expectations the real result cannot meet.
It may be tempting to brighten the after photo so the teeth look whiter, but pushing the shade too far can make the result look better than it really is. Keep the color close to the patient's actual tooth shade.
Avoid using Photoshop, AI tools, or filters to straighten teeth, close gaps, reshape edges, or remove chips that the treatment didn't correct. The photo should reflect the changes made during treatment, not edits made afterwards.
Removing redness, reshaping the gumline, or smoothing the tissue digitally can make the gums look healthier than they are. Leave these details untouched so the image accurately represents the patient's condition and treatment result.
Stains, white spots, and dark patches may be the exact concerns a patient wants to address. Removing them digitally can make the treatment appear more effective than it was, so let the photos show the actual improvement.
Skin-smoothing and face-enhancement filters can change the overall appearance of a smile, even if the teeth themselves remain untouched. Avoid these effects on treatment photos so patients can judge the result without added enhancements.
A darker before photo beside a brighter after photo can make the improvement look more dramatic than it is. Keep lighting, camera angles, distance, and exposure consistent so the difference comes from the treatment itself.
If a patient shares their experience with veneers, the photo alongside their review should show their own treatment result. Using another patient's image can give readers a misleading impression. Always confirm that you have permission to use both the testimonial and the photograph.
Consent to take photos for clinical records doesn't automatically give you permission to use them in your marketing. Get separate, signed authorization that:
Ask for consent at an appropriate time, make it clear that participation is optional, and never pressure patients to agree. Keep track of where each photo appears so you can act quickly if someone withdraws permission. Remove the image from every channel you control and document the action.
Even cropped intraoral photos may not be fully anonymous. Under HIPAA, removing obvious identifiers doesn't always guarantee de-identification, so getting appropriate authorization is a safer approach when using clinical photos in your practice's marketing.
Agreeing to treatment doesn't mean a patient has agreed to appear in your practice's marketing.
Under HIPAA, patient photos and related treatment details may qualify as protected health information (PHI). Your practice generally needs valid written authorization before using them for marketing. The ADA provides a sample authorization for dental practices using patient photos.
Your authorization should specify:
A verbal “Yes, you can post that” during an appointment isn't a substitute for written authorization when HIPAA requires it.
Can dentists use before-and-after photos in marketing without patient consent?
No. Even if a photo seems anonymous because it only shows teeth, you generally need the patient's written authorization before using it for marketing purposes. Consent for clinical records is not the same as consent for marketing. Your authorization should specify where the photos will appear and how a patient can withdraw permission later.
Is cropping or resizing a before-and-after photo considered an edit that could mislead patients?
Usually not, as long as the crop does not remove context that helps patients understand the result, such as a shade guide or surrounding teeth. Cropping, resizing, and straightening a tilted photo are generally considered safe edits because they improve how the image displays without changing the clinical outcome shown.
What happens if a dental practice edits a before-and-after photo to make results look better than they are?
This can raise both legal and ethical concerns. In the U.S., it may conflict with FTC guidance on truthful advertising, and in the UK, it could run against ASA advertising rules or GDC standards. Beyond regulatory risk, it also sets expectations patients may feel misled by once they see their actual results.
Does HIPAA apply to dental before-and-after photos used on social media?
Yes, in most cases. Patient photos and treatment details can qualify as protected health information under HIPAA, which generally means your practice needs valid written authorization before posting them, even on channels like Instagram or Facebook. The authorization should name the platforms where the images may appear.
How long should a dental practice keep records of photo consent forms?
Keep signed authorization forms for as long as the photos remain in use across any marketing channel, and ideally longer as part of your patient records. If a patient withdraws consent, remove the image from every channel you control and keep documentation showing when and how that was done.



Harsh Bansal has spent 15 years pioneering, scaling, and redefining what dental marketing and data can truly unlock. He is at the forefront of AI-driven dental growth, helping more than 8,000+ dental practices and DSOs worldwide attract more patients, strengthen their market presence, and gain the financial clarity needed to drive sustainable growth.

Key Takeaways
The Same Three Ranking Factors, a UK-Specific Context
UK-Specific Factors That Affect Ranking
What's Actually Working for UK Practices Right Now
A Fast Way to Find Your Specific Gaps
Common Mistakes
Building This Into an Ongoing UK Local SEO Approach
A Worked Comparison
What to Check Before Hiring Outside Help
Conclusion
FAQ
Our healthcare marketing expert will get in touch with you